Step 1: Declare parameter as list box for selection screen by using below command: –
PARAMETERS: … TYPE … AS LISTBOX VISIBLE LENGTH nn.
Step 2: Declare two variables; one internal table and one work area.
Table Type: VRM_VALUES
Structure: VRM_VALUE
Note: VRM stands for Value Request Manager.
*See VRM_VALUES and VRM_VALUE structures at Appendix A.
Step 3: Under INITIALIZATION event, assign value of key and text into GW_VRM-KEY
and GW_VRM-TEXT respectively then append GW_VRM to GT_VRM.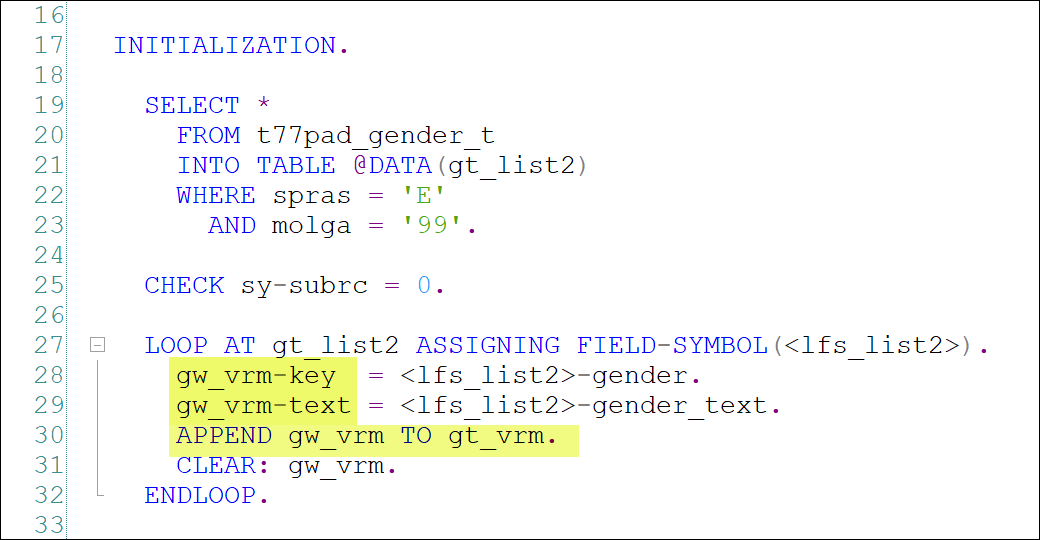
Step 4: Call VRM_SET_VALUES function.
Specify the list box name (from Step 1) and export GT_VRM value.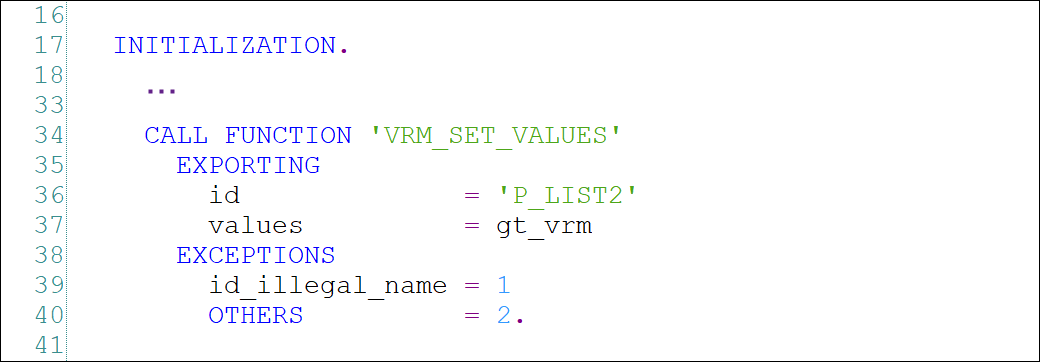
*See source code at Appendix B.
Appendix A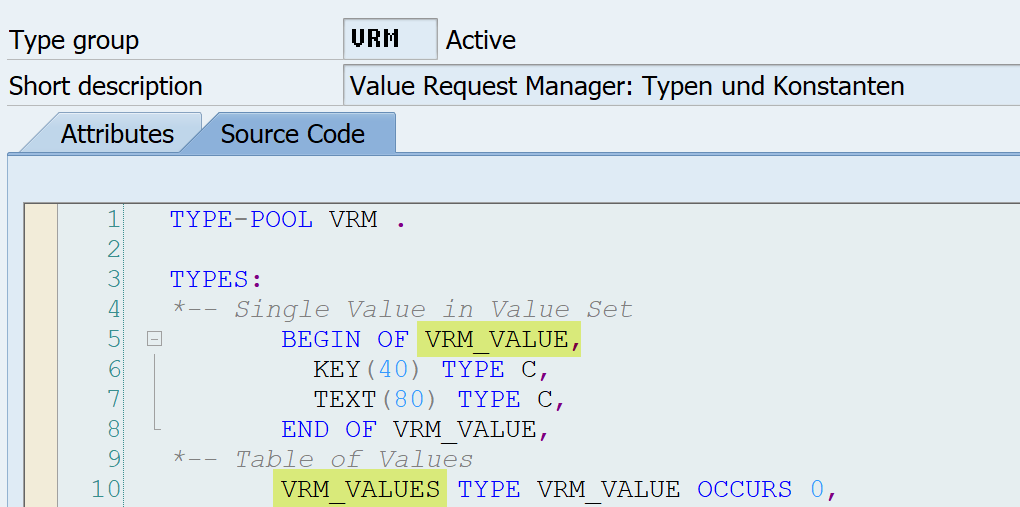
Appendix BPARAMETERS:
p_list1 TYPE mseg-bwart AS LISTBOX VISIBLE LENGTH 25,
p_list2 TYPE char80 AS LISTBOX VISIBLE LENGTH 25.
DATA:
gt_vrm TYPE vrm_values,
gw_vrm TYPE vrm_value.
INITIALIZATION.
SELECT *
FROM t77pad_gender_t
INTO TABLE @DATA(gt_list2)
WHERE spras = 'E'
AND molga = '99'.
CHECK sy-subrc = 0.
LOOP AT gt_list2 ASSIGNING FIELD-SYMBOL(<lfs_list2).
gw_vrm-key = <lfs_list2-gender.
gw_vrm-text = <lfs_list2-gender_text.
APPEND gw_vrm TO gt_vrm.
CLEAR: gw_vrm.
ENDLOOP.
CALL FUNCTION 'VRM_SET_VALUES'
EXPORTING
id = 'P_LIST2'
values = gt_vrm
EXCEPTIONS
id_illegal_name = 1
OTHERS = 2.
Simplify ABAP Life by ABAP Memo